Your Ad Here

Monday, January 24, 2011

Macbook fan mod

   I bought a 13'' white Macbook in the summer of 2008.  I didn't know much about Apple computers when I bought it, and that's kinda why I bought it.  It worked just fine, but after about a year of using it, I noticed it started to get laggy.  I also started noticing that it got hot underneath.  This got even worse when I was booted up into my Windows partition.  I found a program called smc fan control that let me adjust the fan speed manually, and that helped a lot, but only for a time.  
   I searched my problem, and although I found that a lot of people were having the same problem, various fan control applications were the only solutions I really found.
   I also read that Apple computers had the Macbook designed by an architect instead of an engineer.  WTF?  Architecture is definitely a respectable profession, but honestly, what do they know about designing a computer that an electrical or mech E dont?  The Macbook was designed (I'm confident) without considering the effects of heat.  The best that they came up with was that air could be taken in from the little teeny tiny gaps in between the keyboard keys.  That is ridiculous.
   I eventually had to take an aluminum ruler and set it underneath with a cup of ice on the end as a heat sink when I was using more CPU intensive programs.


   Over the summer I took off the top case and keyboard assembly to see how much dust and lint had gotten caught up in the fan, ad it was quite a bit.  I took a picture of it, but ant seem to find it now.  What I found looked like small a triangle of dryer lint clogged up in the cooling fins where air is suppose to exit the machine.  I cleaned it out and noticed a great improvement, but it still wasn't as good as I wanted it to be.

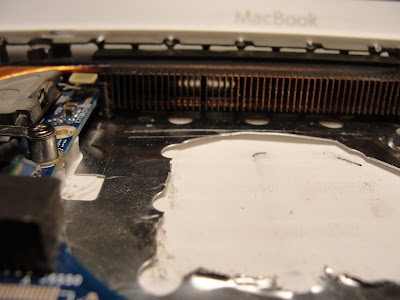
   I recently got a job that requires me to do a lot of Matlab coding.  I knew that my macbook probably couldn't do it unless I did something drastic.  My idea was to cut out a chunk of the case under the fan.  It was a good idea, but would have look ugly.  I looked up some kind of cool circular design (as the fan is circular) but didn't find anything that was either a viable option or liked.  I waited a while and let my subconscious mull it over.  It turned out to be a great success.  What I came up with made the conscious part of my brain feel embarrassed because I am a nuclear engineering student - I decided to do the radioactive trefoil.

   I use a guide from ifixit to take the fan assembly out and went from there.  The pictures are pretty straight forward.


I was temped to just leave at that.  It kinda looks like some sort of creepy skull.


I had filed it down.


Don't look too closely at it or you will see how crappy it is.  Something about it looks lopsided, but whatever, its underneath.


   I went to a hardware store and bout a screen door patching kit.  The little pieces of screen patch in it turned out to be the perfect size.  I secured it with a little hot glue and put the fan back on and re assembled the whole thing.

   Since then, by temperature has gone from the mid 60's C, to mid 30's C when using it.

Wednesday, December 1, 2010

Mitsubishi Eclipse trunk floor rebuild


   When I bought my used 2g eclipse it came without a trunk floor.  After putting up with it for a few years, I got tired of mining my groceries out of the spare tire well.  This last summer I decided to build a floor for it.  The floor turned out remarkably better looking than I thought.


   The whole process took the equivalent of a weekend of dedication if you follow my method (it took me a little longer because I had never done this before).  If you are interested I'll include a list of materials, tools, and approximate cost at the end.

   Because I didn't have a floor to begin with, I had to find the dimensions the hard way:


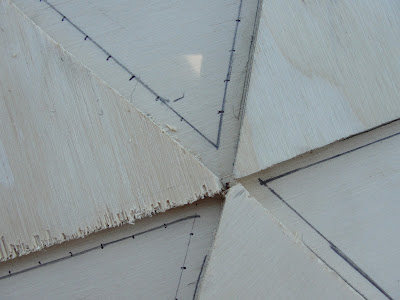
   So, after that, I went out to a hardware store and bought some 1/4 in. 4x8 ft plywood and traced my cardboard-posterboard-tape frakenstein stencil onto it and cut it out with a jigsaw.  I also cut out a handle for access to the spare tire underneath.


   I planned on covering it with carpet, and know that the carpet would have some sort of thickness to it, so I tried to cut the floor board about a cm. smaller than it actually was. (I turned out to be right on).


    With the left over chunk of plywood I traced out and cut the DSM (Diamond Star Motors) logo.  I Found the easiest way to do this is to simply image search the Mitsubishi logo (or whatever logo you want), blow up and print the size you want and trace that, and then cut with a jigsaw again.

   With the DSM in place, I wood glued it to the floor.  The wood glue is only meant as a means to hold it in place, a permanent holder will be addressed later on.

   I also went to a local carpet store and bought some felt carpet padding to apply to the underside of the floor as soundproofing/insulation.  It only helped the trunk a little, but I still recommend it as the padding is very cheap and helps your local economy.  Protip: Buy way more padding than you need and soundproof your whole car by sticking it between the interior panels and car frame.


More to come soon!

Continued:


   Trace, cut out, and save for later.  Do the same with the carpet, which can also be bought at any local carpet store for relatively cheap.  Cut the carpet with an additional 3 to 4 in. radius.  I went to two places and both had either black or grey.

   My original plan was to use spray adhesive and try to mold the car carpet around the stars, but soon realized that that would look dumb when the glue came undone.  I decided to stitch the carpet around because that would both hold the carpet in place and better define the embossed look I was hoping for with the stars.
   I used a dremmel tool with a small bit to drill holes through the board for the stitching setting them approximately 1 cm apart.


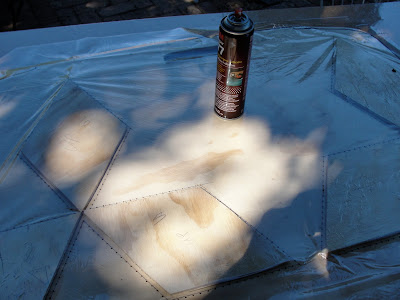
    I also bought a plastic film to act as a sort of water barrier in case I had some kind of spill or wet stuff in my trunk.  It just turned out to be a mess sticking it on.  I got spray adhesive all over, dust and other stuff got stuck to it while putting it down, I got glue all over my hands.  I wouldn't recommend it.


   With the holes drilled I got to stitching.  I bought a spool of red string because regular thread definitely would not have the strength needed and threaded it through a huge needle I found in my mom's sewing stuff .  I soon realized that the string was getting worn out from the friction from going through the holes and carpet.  To solve this I cut off ~8ft pieces, stitched them, and tied them together.  I stitched them using a "backstitch".
pic from wikipedia                                                            


   This took a very long time to do.  Like 4 hours.  But it was a nice summer day and I had some PBR to keep me going.


   It payed off though.  I was surprised at how professional something I made for a first try looked!  The thin red line of stitching added a subtle highlight to it that I really liked.  Plus the thought that it was hand stitched made it sound expensive in my mind.


   After looking at it and seeing that I had basically preferated the board for my stars, I decided to add those two 1/2 in. supports.  I simply glued them on and drilled a couple of short screws in too.
   You can see in the larger version version of the picture where I tied the ends together like I mentioned above.


A few more pieces of carpet padding glued on to fill in the gap from the supports and then glued the large piece of padding.


   I cut out parts of the excess carpet I left on so that I could wrap up the ends nicely.  I abandoned the spray adhesive for the carpet molding around the sides because it would not have held.  Instead I used a hot glue gun and some binder clips to hold it in place until the glue cooled.


   I also hot glue gunned the bottom cover of carpet, then it was done!


   These pictures aren't very good, I took them with a camera I just got and didn't know how to use yet.


   Like I said before, this wasn't a huge project, and you could do it over a weekend if you planned ahead.  Here's a list materials and equipment I used:

Materials:
  ~ 6x8 ft. felt carpet padding
  ~ 6x8 ft. grey car carpet
(from carpet store)

 1/4in. 4x8 ft plywood
Spray adhesive
(hardware store)

Poster board and tape
Spool of string
Thick needle
Hot glue gun and sticks
Large binder clips
(arts and crafts type store)


Equipment:
Jigsaw
Drill and small drill bit

Cost of project ~ $60